United Airlines Alterations Program
Last updated: December 13, 2025
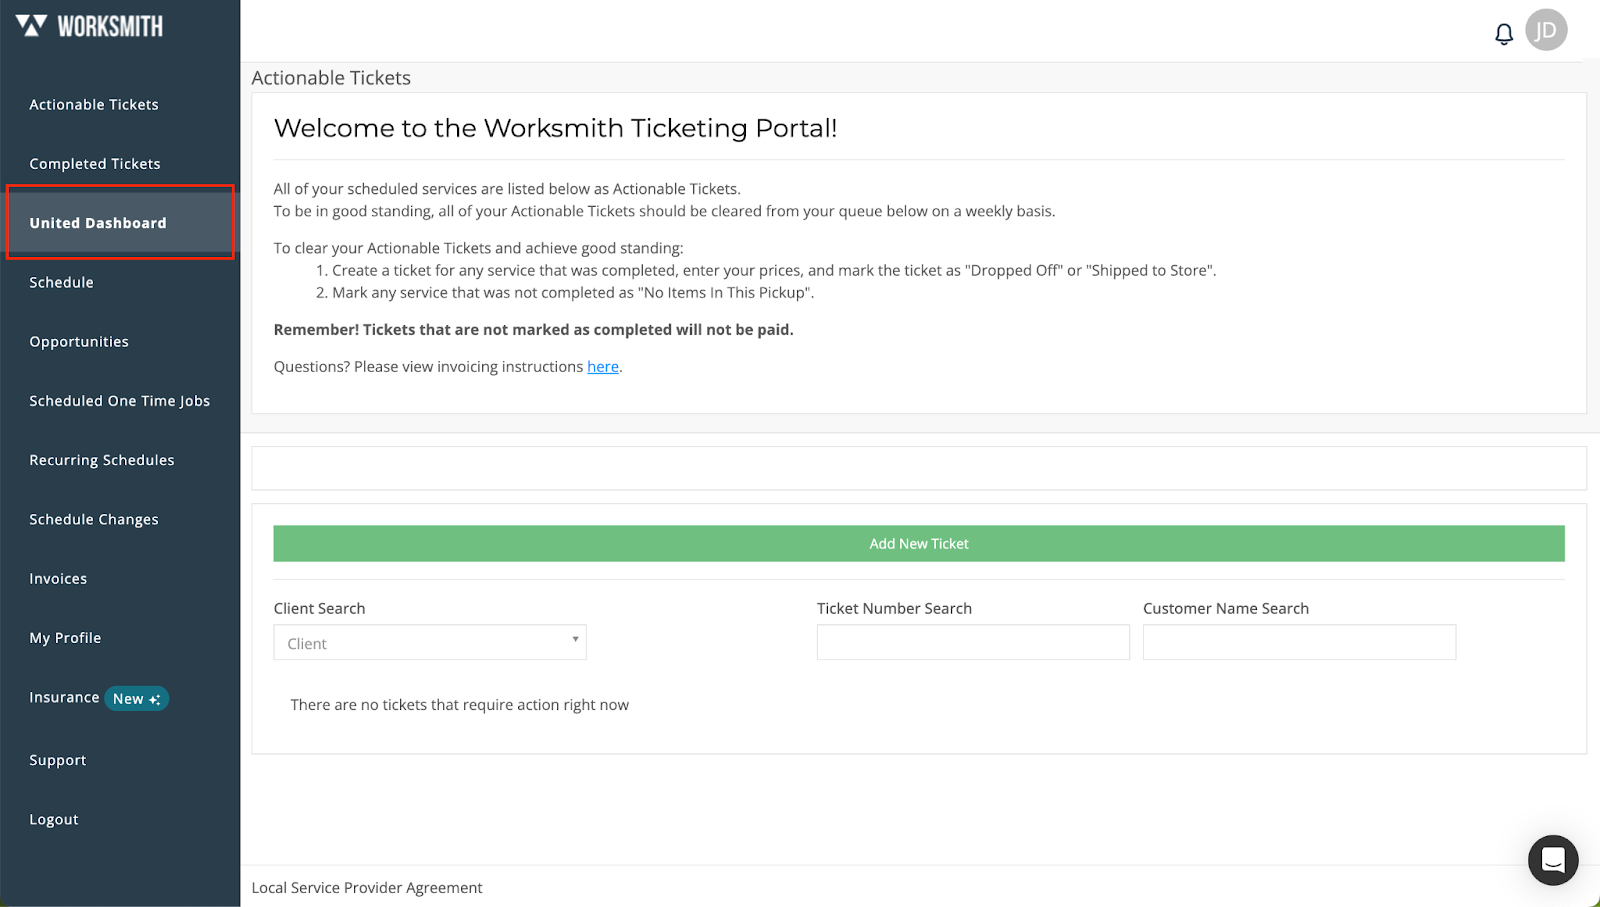
1. Navigating the United Airlines Program in Worksmith
All alteration requests for United employees will be located under the “United” section in your Worksmith dashboard.
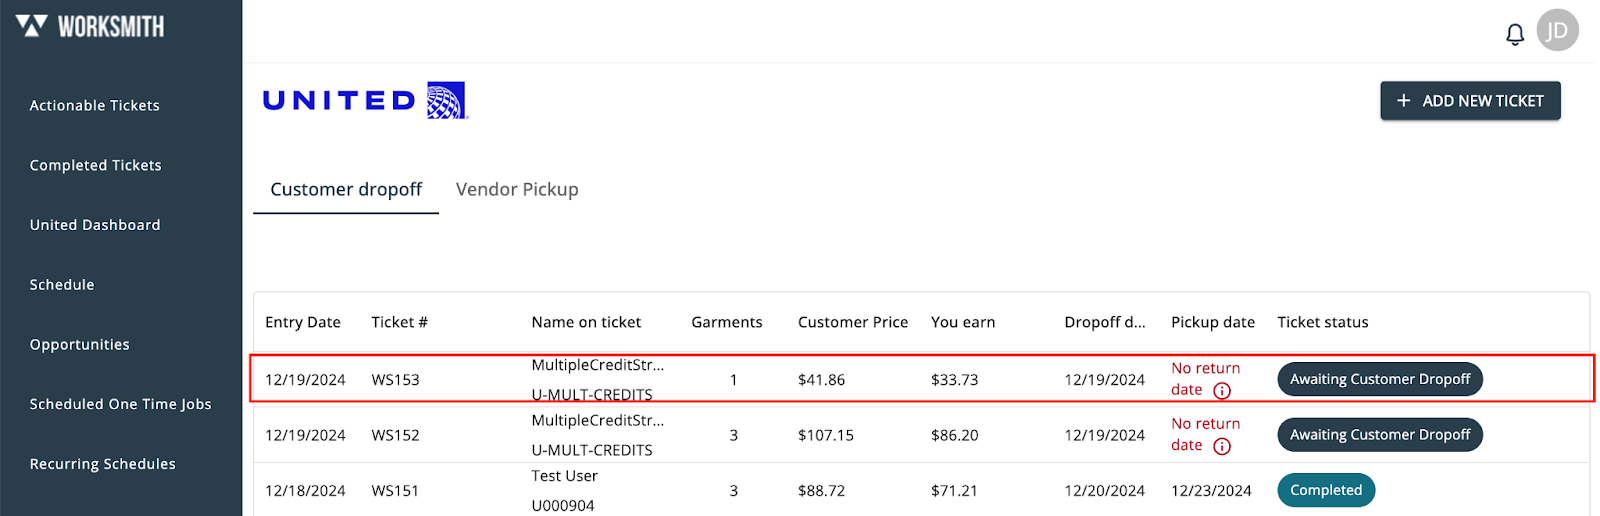
2. Check for an Existing Ticket
- Before creating a new ticket, search for the employee to see if they’ve already submitted a request.
- Navigate to the “United” section.
- If a ticket exists, it will be listed under the employee’s name or ID.
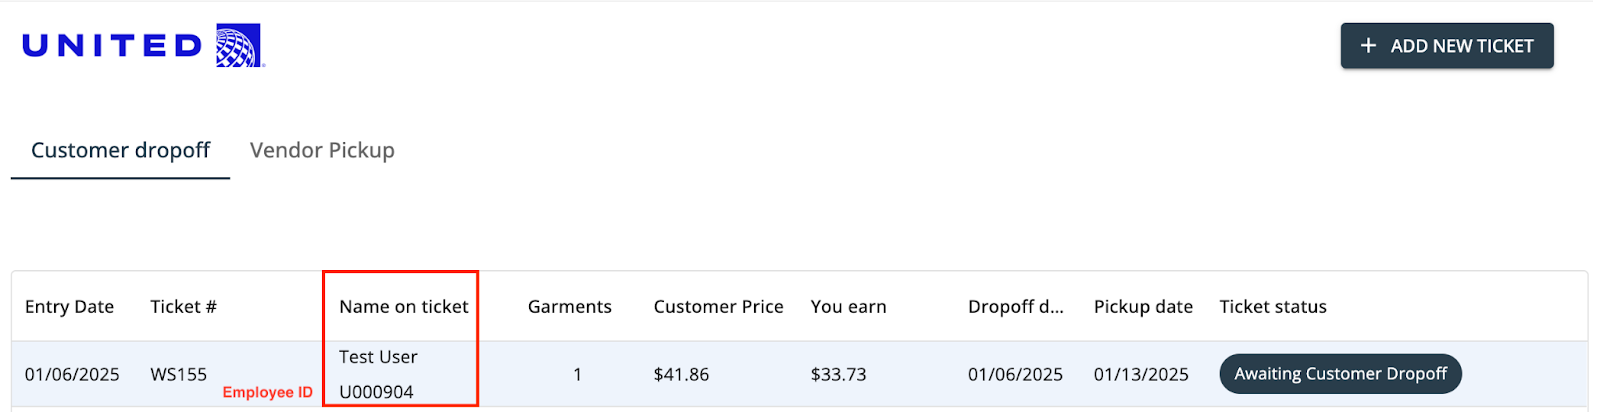
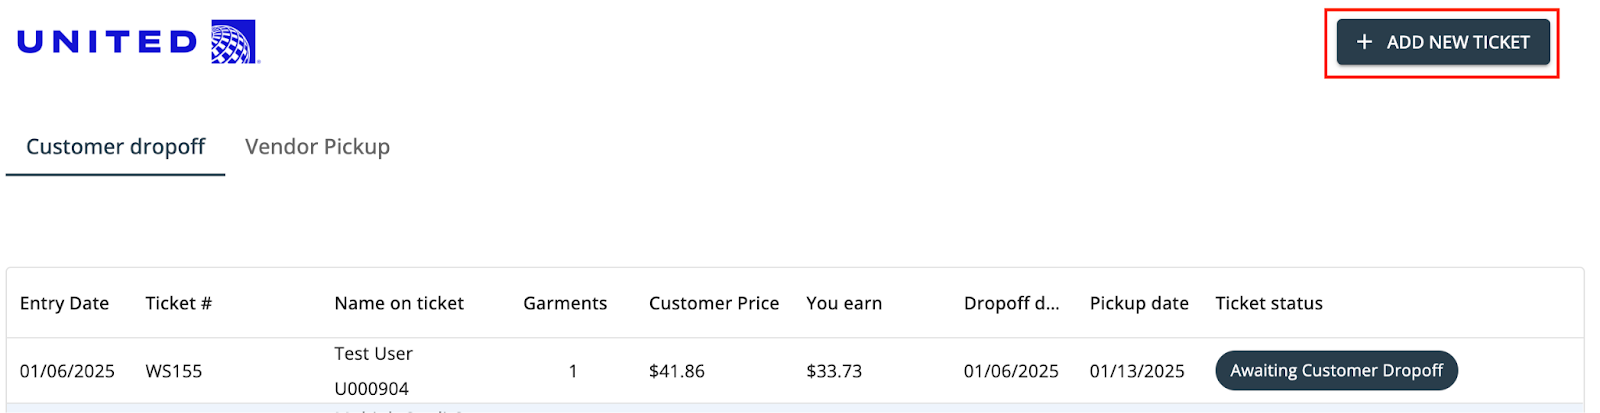
3. Creating a New Ticket
- If the employee has not yet created a ticket:
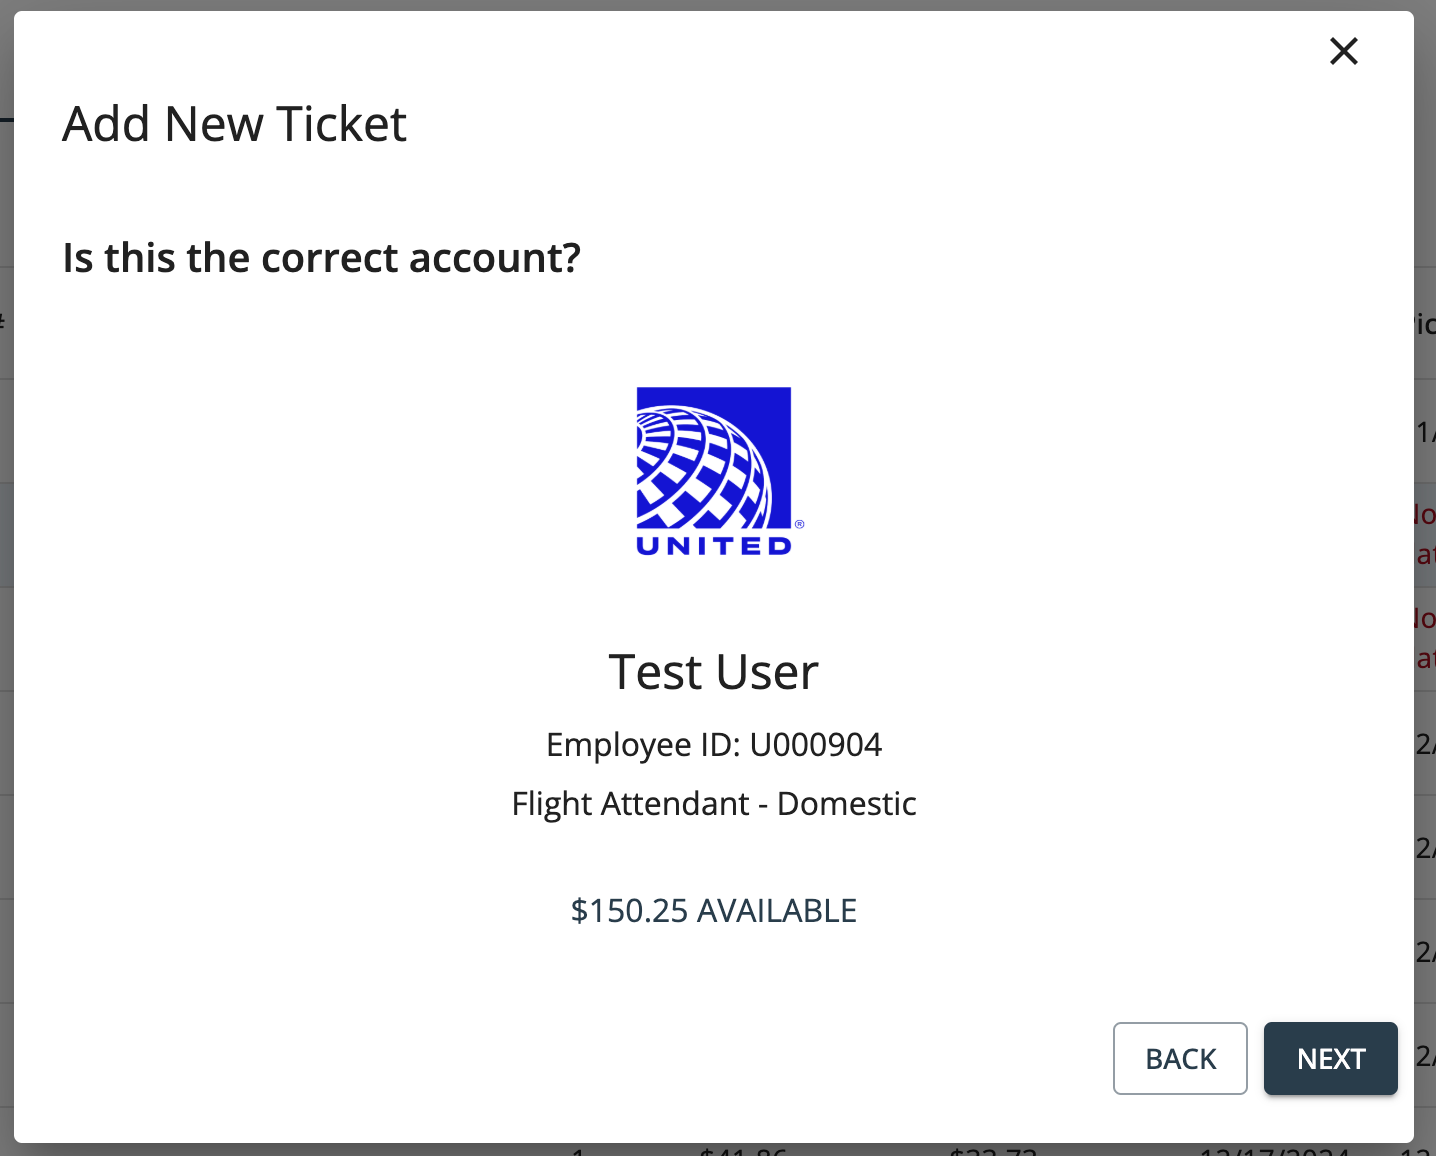
- Select “Add Ticket.”
- Search for the employee using their Employee ID.

4. Adding Items to a Ticket
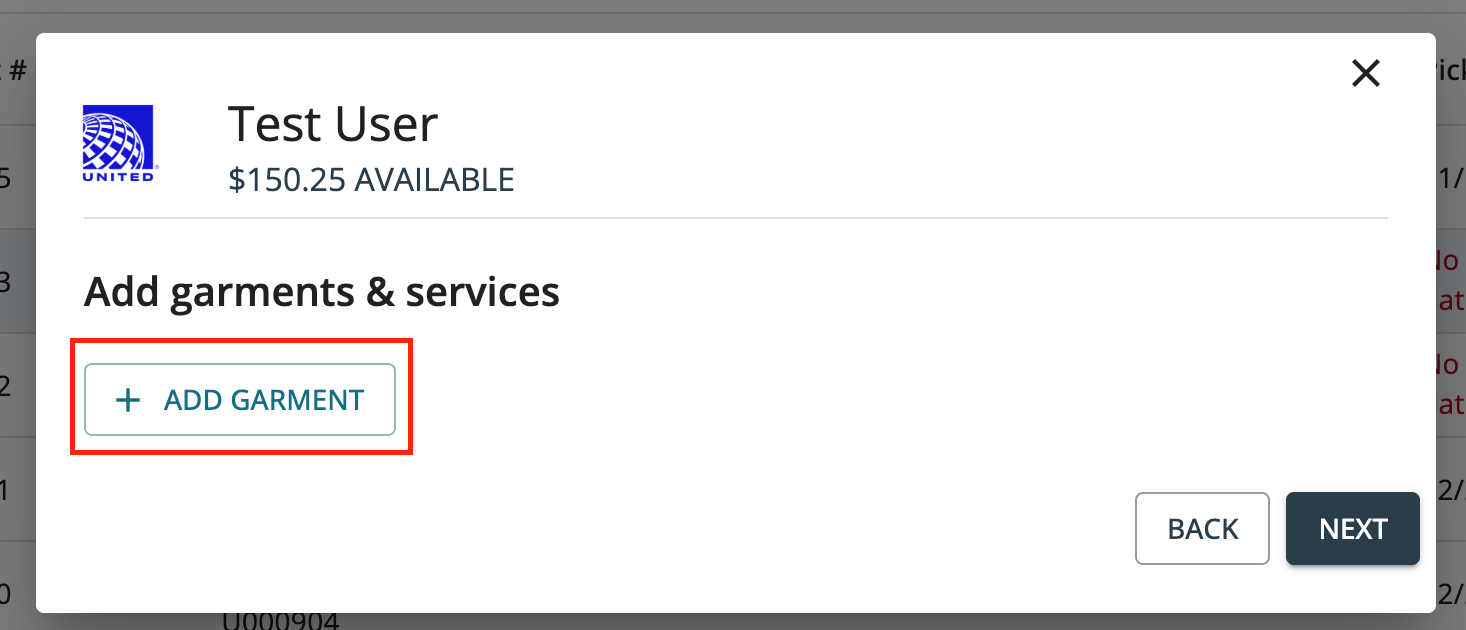
- Add the garments and/or alterations, along with any relevant notes.
- For standard items, the pricing we have on file will automatically populate (this reflects your cut).
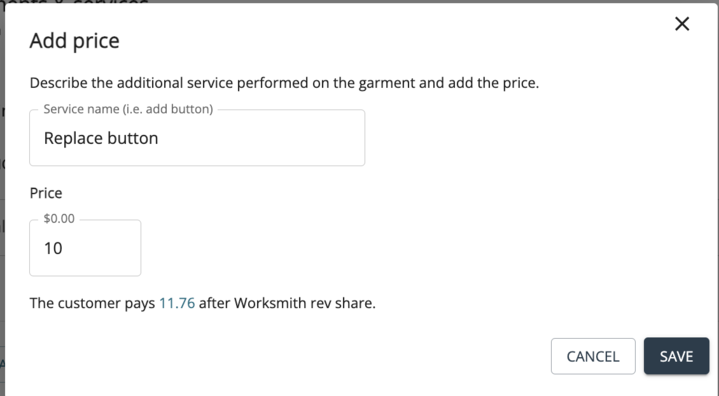
- For "Other" garments, the employee will input the garment and alteration details. You will then need to enter your prices, and our system will prompt you to do so.
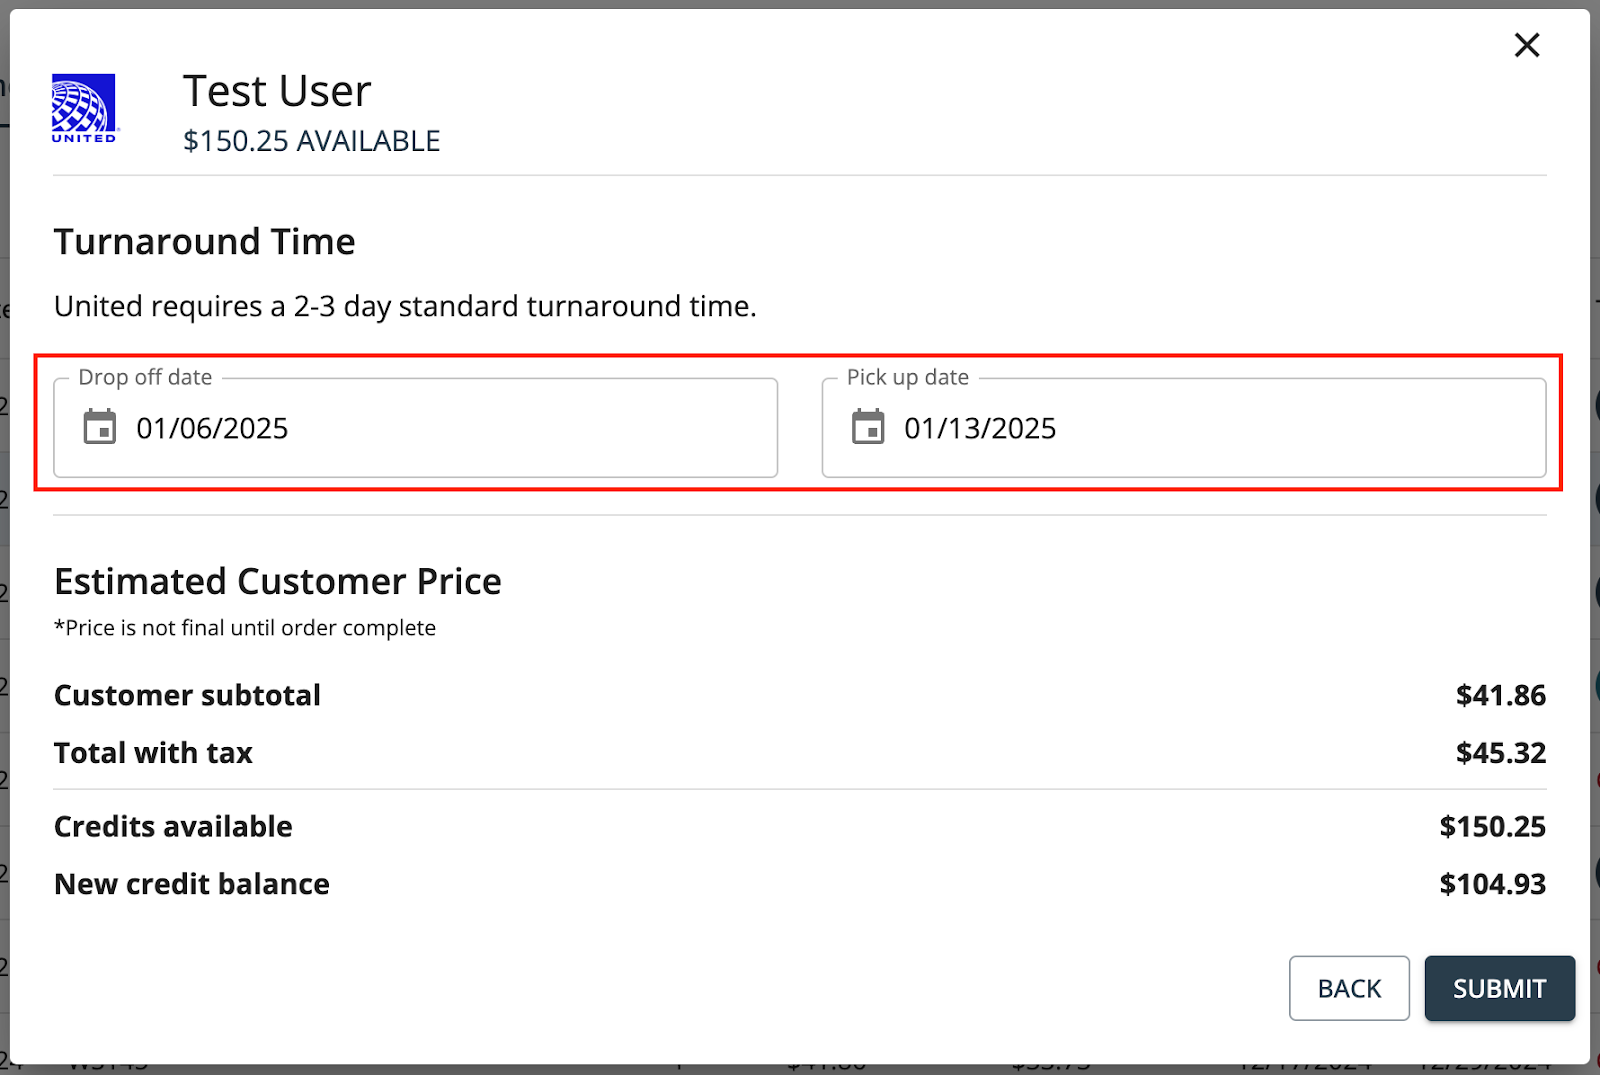
- Enter the date the employee dropped off the garments.
-
Add the date the garments will be ready for pickup
STANDARD ITEMS WORKFLOW:


CUSTOM GARMENT WORKFLOW:


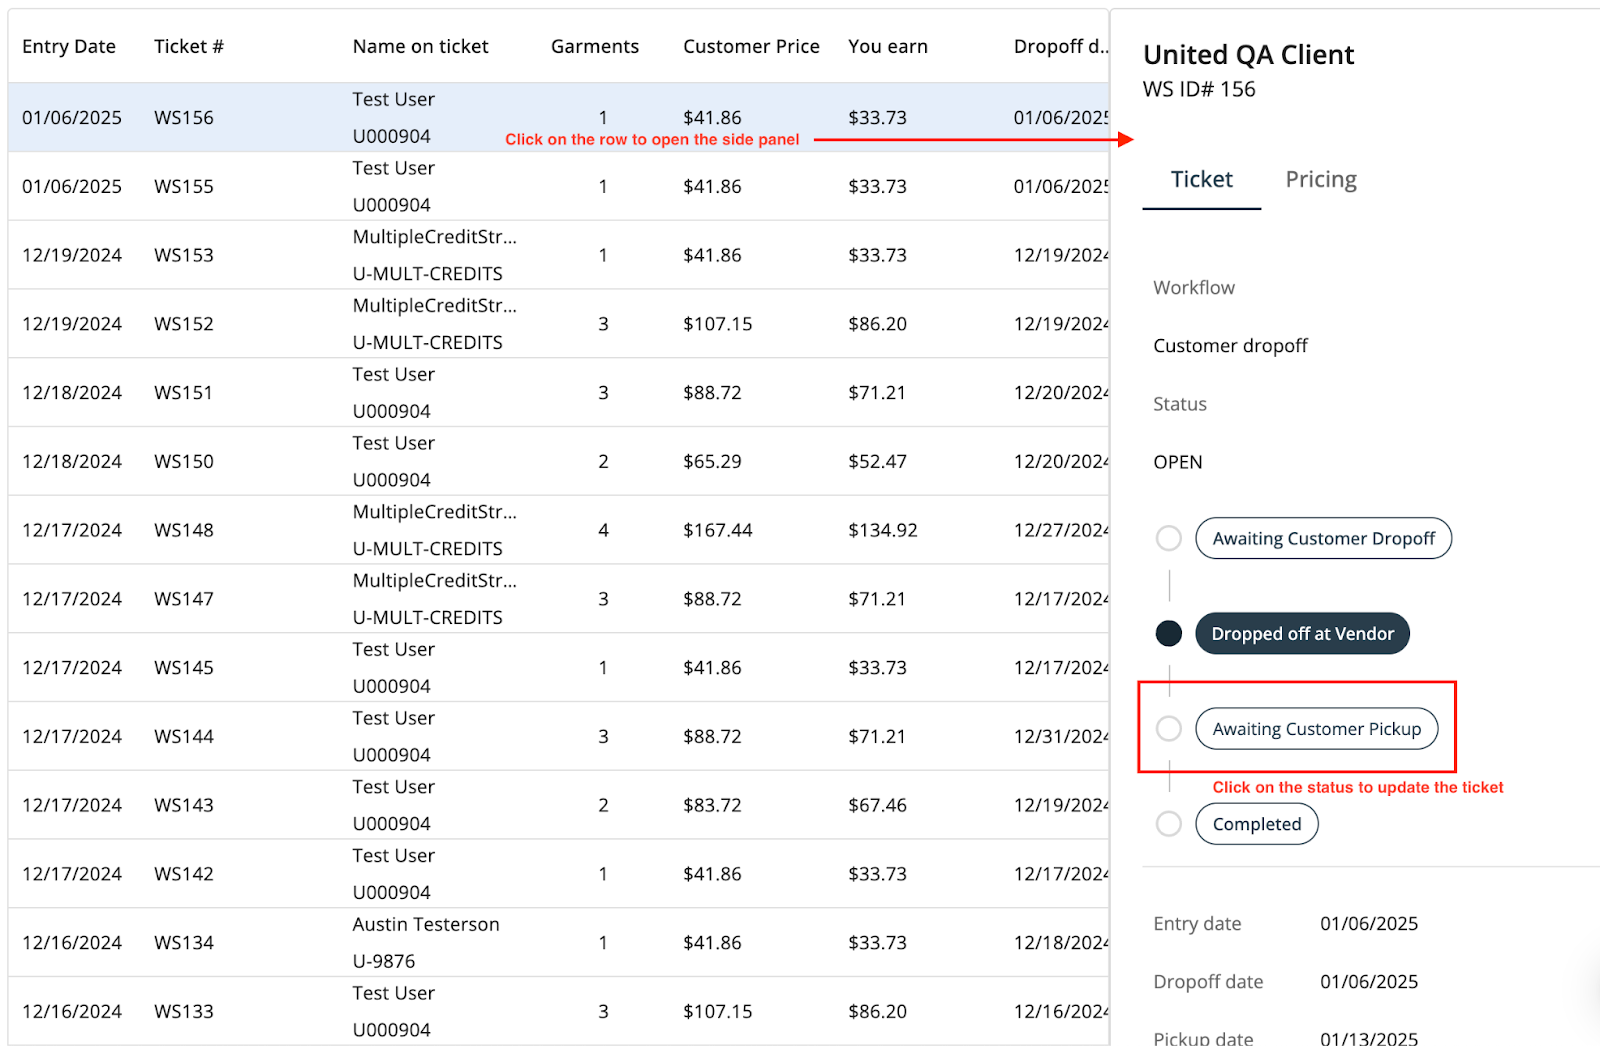
4. Communicating with the Employee and Updating the Status of the Ticket
- Once you’ve reviewed the ticket and received the garments:
- Inform the employee of the pick-up date for their garments.
- If the employee created the ticket, Update the ticket status to “Dropped off at Vendor” to confirm the items have been received. If you created the ticket, it will automatically go into this status.
- When the garments are ready update the status to Awaiting Customer Pickup to confirm the items are ready for pickup.
- Once the employee picks up the items, update the status to Completed to confirm the ticket is done. Marking the ticket complete as soon as the garments are picked up by the employee will ensure timely payment from Worksmith.
5. Payment Options and Terms
- Payment Methods:
- ACH/Direct Deposit (Highly Recommended)
- Please email accounting@worksmith.com, and our team will assist with your payment setup.
- When you reach out, include the email address where you’d like the Bill.com invitation sent.
- After we submit the invite, Bill.com will guide you through setting up ACH/direct deposit step by step.
- Check
- Payment Release Schedule:
- Payments are released three times per month based on invoicing deadlines: 10th, 20th, and last day of the month.
- To be included in a pay period, jobs must be marked complete by 5 PM CST on the invoicing deadline.
- If the release date falls on a weekend or holiday when banks are closed, payment will be released the following business day.
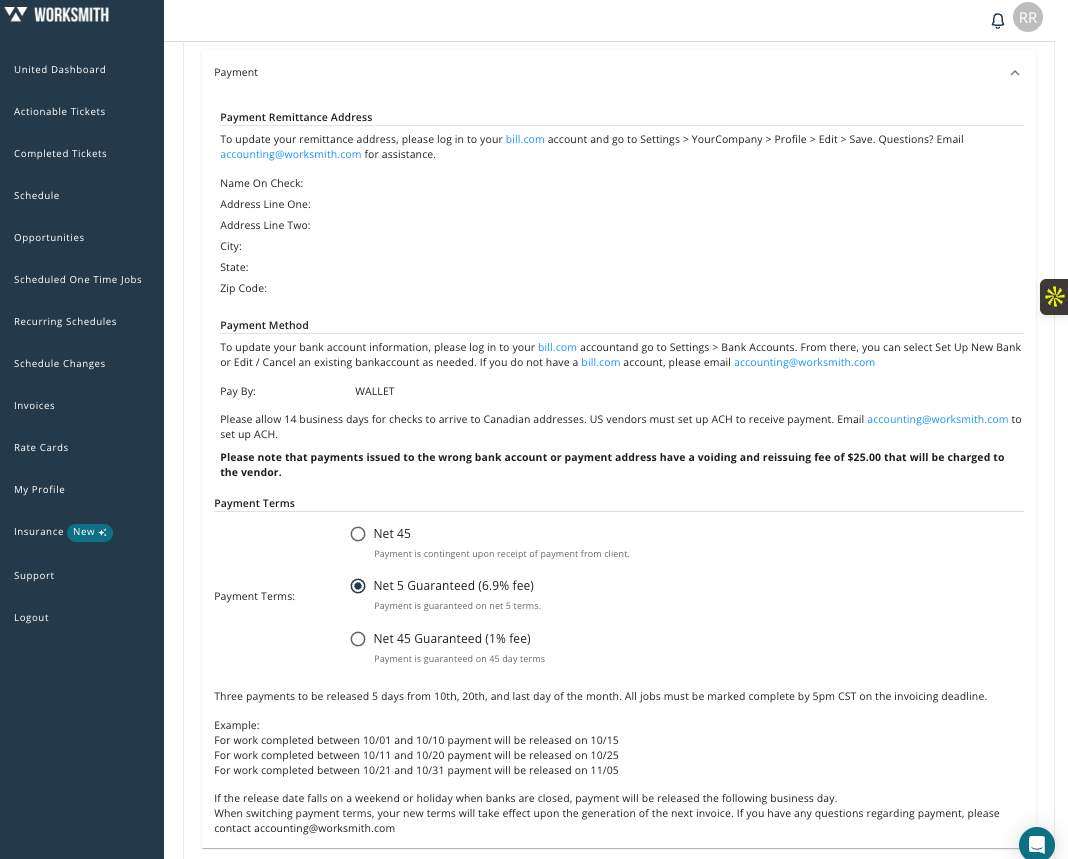
- Payment Terms:
- Net 45 Standard:
- Payment is released 45 days from the invoicing deadline.
- Payment is contingent upon receipt from the client.
- Example: Work completed between 09/01 – 09/10 will be paid on 10/25.
- Net 45 Guaranteed (1%):
- Payment is guaranteed and released 45 days from the invoicing deadline.
- Example: Work completed between 09/01 – 09/10 will be paid on 10/25.
- Net 5 Guaranteed (6.9% Fee):
- Payment is guaranteed and released 5 days from the invoicing deadline.
- Example: Work completed between 09/01 – 09/10 will be paid on 09/15.
- Net 45 Standard:
- To make changes to your payment terms - check on “My profile” and scroll down to “Payment” and select one of the options below.
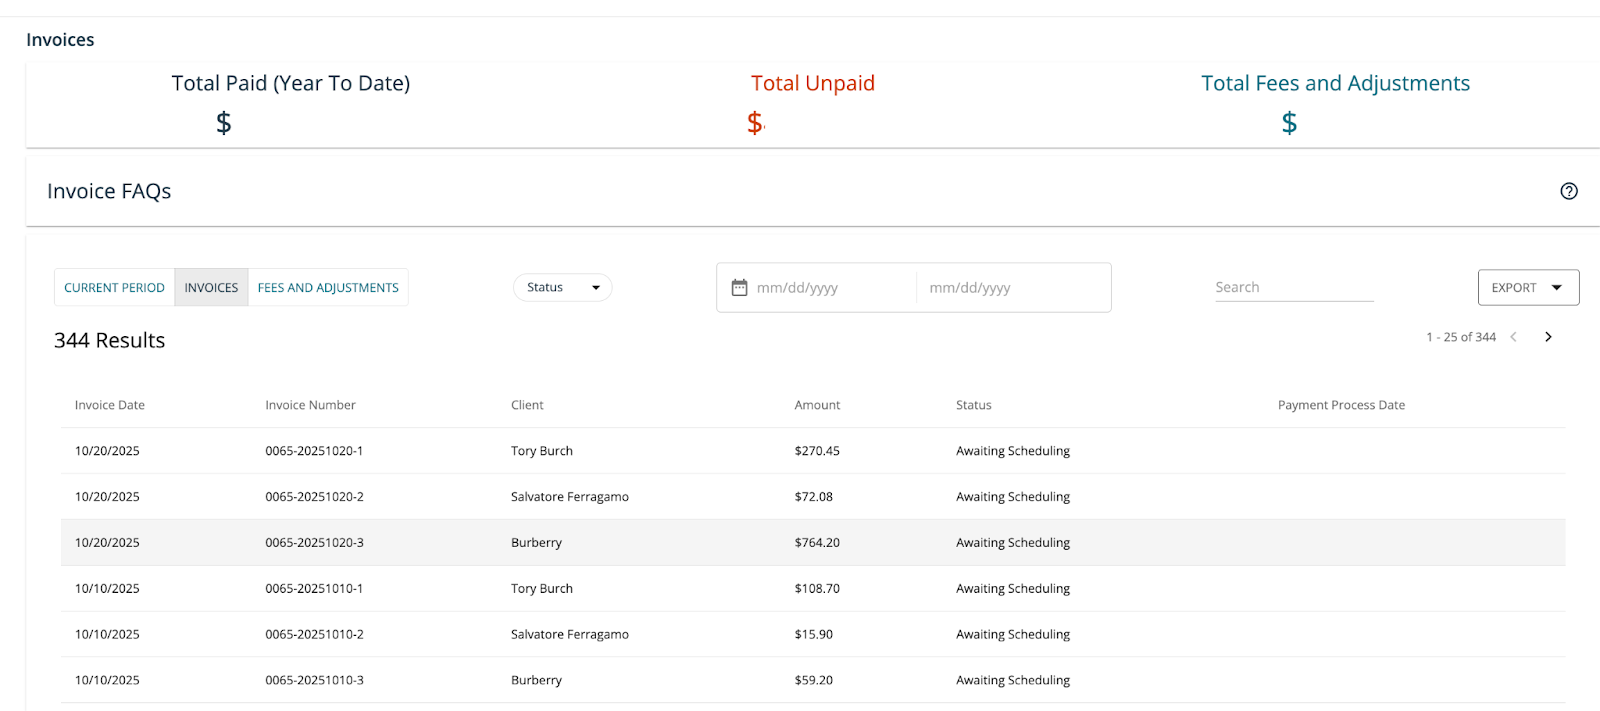
6. Invoices
- View invoices & payment timing
- Go to the Invoices tab to see upcoming payments.
- Click any Invoice # to view details, including the expected release date, client name, service date, and ticket numbers
- Export for your records
- Use Export to download either:
- A summary (high-level totals), or Itemized details (line-by-line).
- Exports are helpful for cross-referencing with your internal system.
- Use Export to download either:
7. Location and Hours
- Why this matters: Keeping your address and hours up to date ensures employees arrive at the correct location and that a seamstress is available for fittings.
- Update Physical Address:
- Go to My Profile
- Scroll to Physical Address.
- Complete all fields (street, suite, city, state, ZIP).
- Add your store website so employees can easily find you.
- Verify Location Hours:
- In My Profile, open the Location Hours section.
- Review your current hours.
- Click Edit to make any changes.
- Save when finished.